Data Management
Registering Data
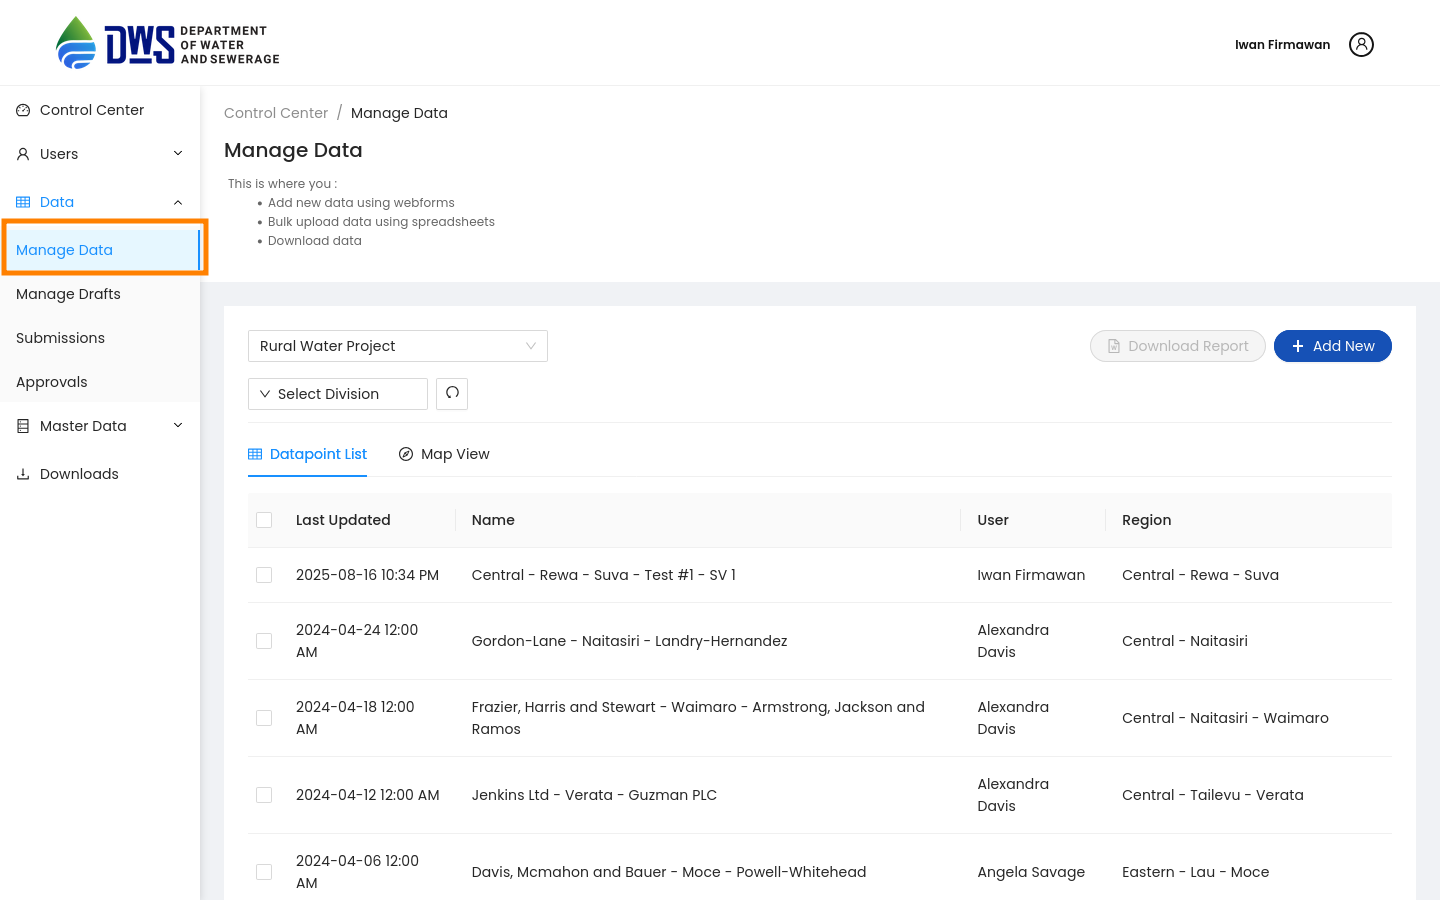
From the Sidebar of the control center, click the Manage Data menu to view and manage your registration data.
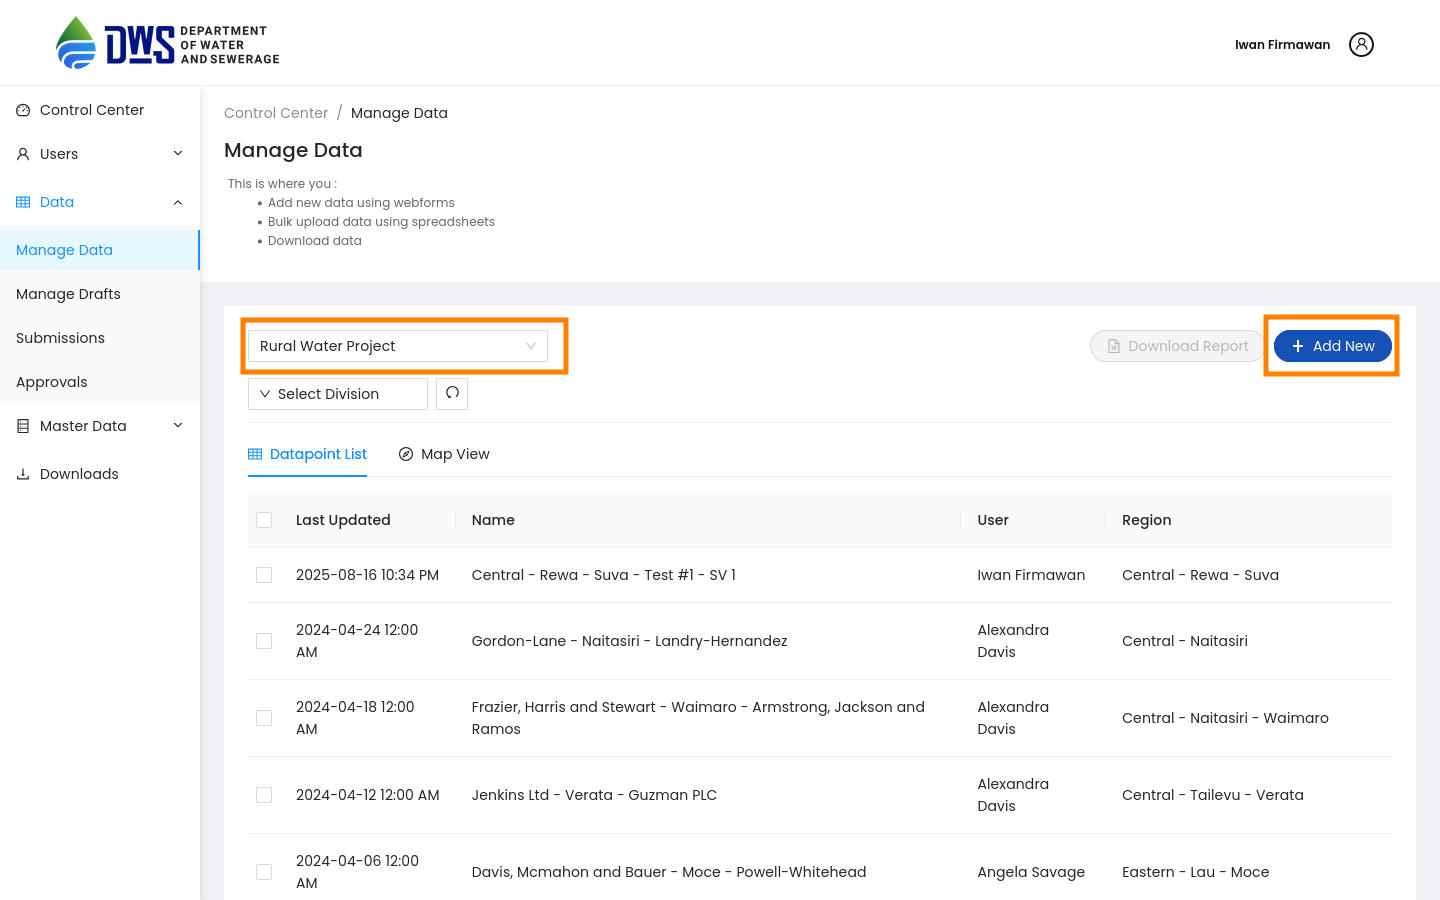
Select the questionnaire you want to register data for from the dropdown menu. Then click the Add New button to create a new data entry. This will redirect you to the Webforms page, where you can fill in the data for the selected questionnaire.
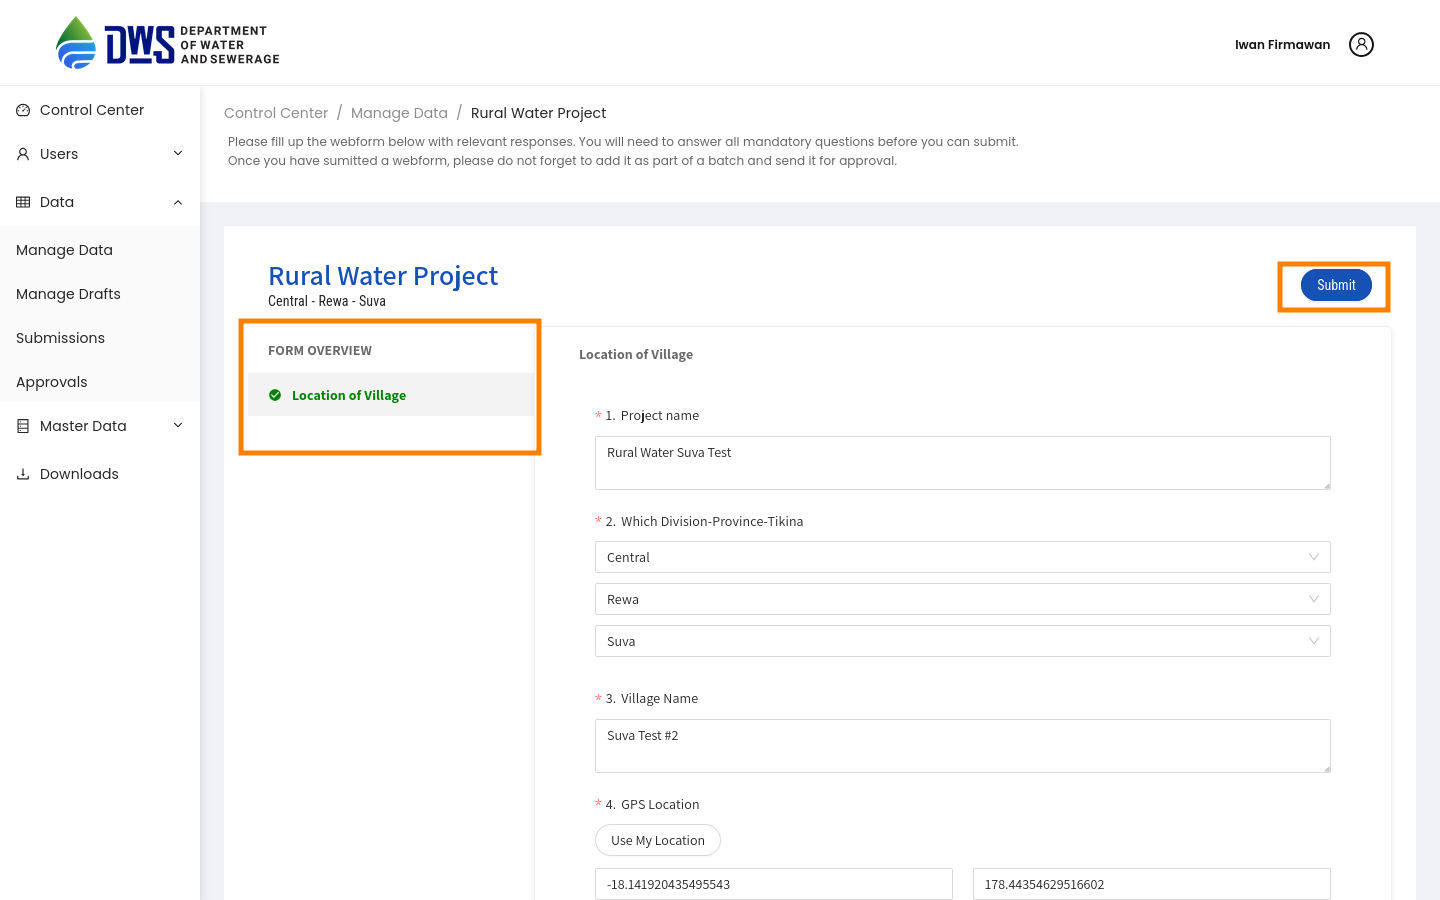
Fill all the mandatory fields in the Webforms page and click the Submit button to save the data.
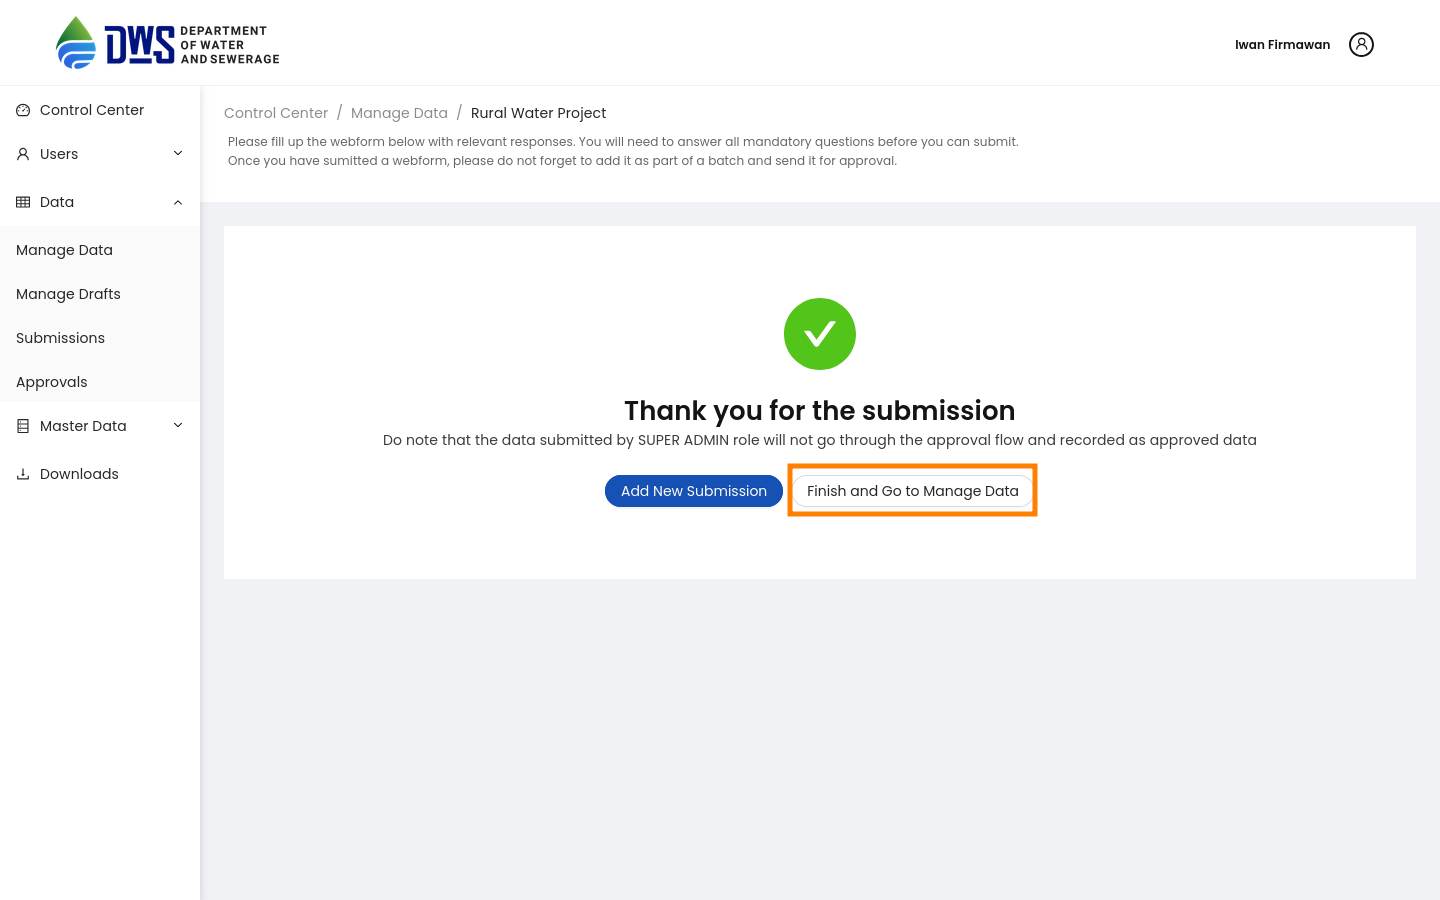
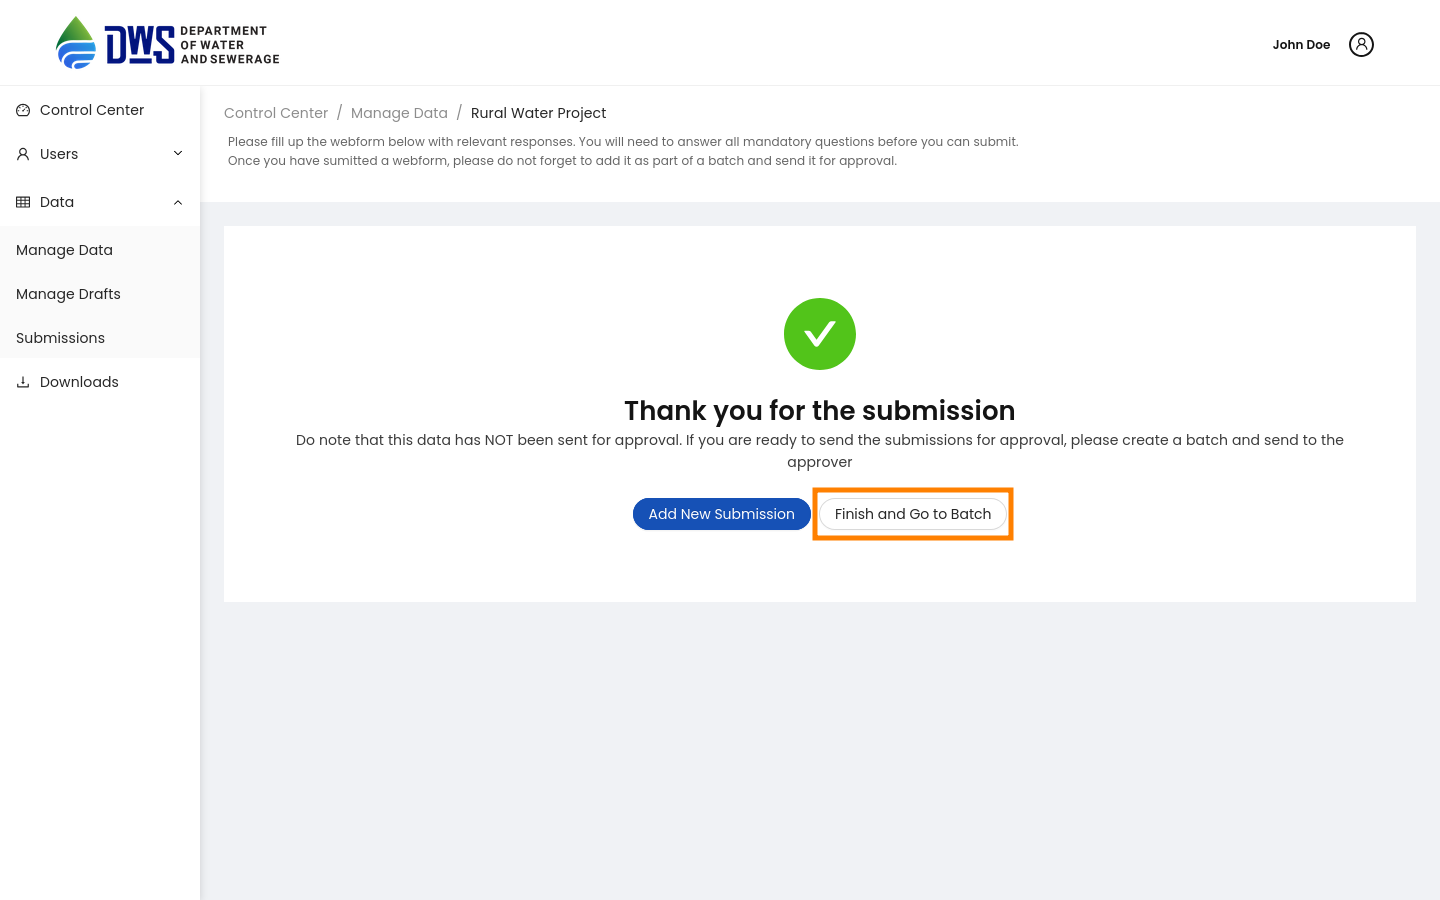
After saving the data, you will be redirected to the Thanking page, where you have 2 options:
Add New Submission: Redirects you back to the Webforms page to register a new data entry for the same questionnaire.
Finish and Go to Manage Data: Conditional option that appears if the questionnaire is automatically approved. It redirects you to the Manage Data page, where you can view the registered data.
Finish and Go to Batch: Conditional option that appears if the questionnaire is a pending submission. It redirects you to the Batch page, where you can manage the batch submission.
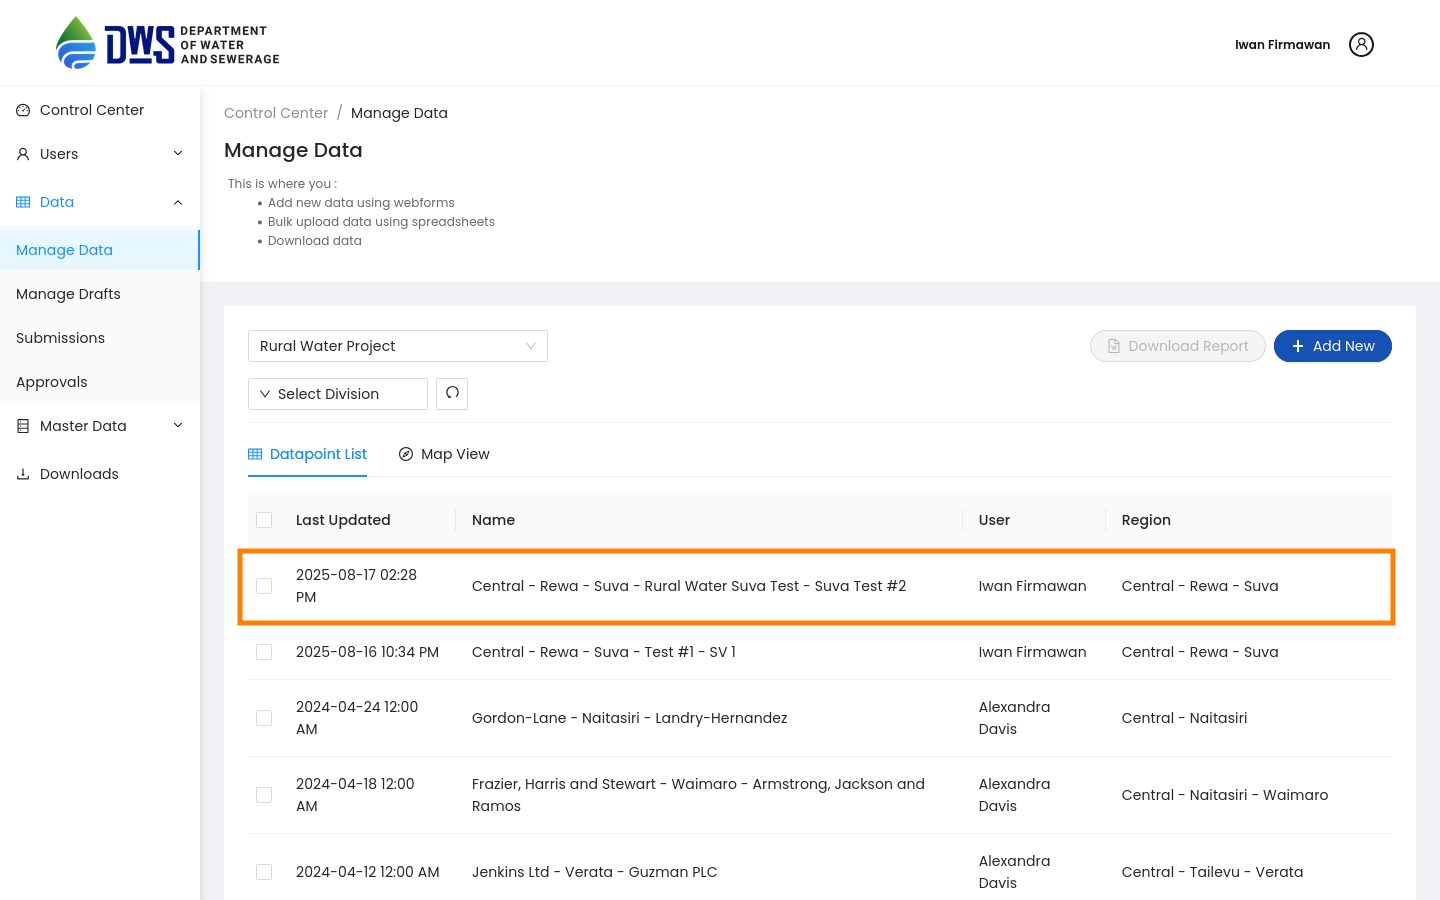
In the Manage Data page, you can filter the data by questionnaire and administration.
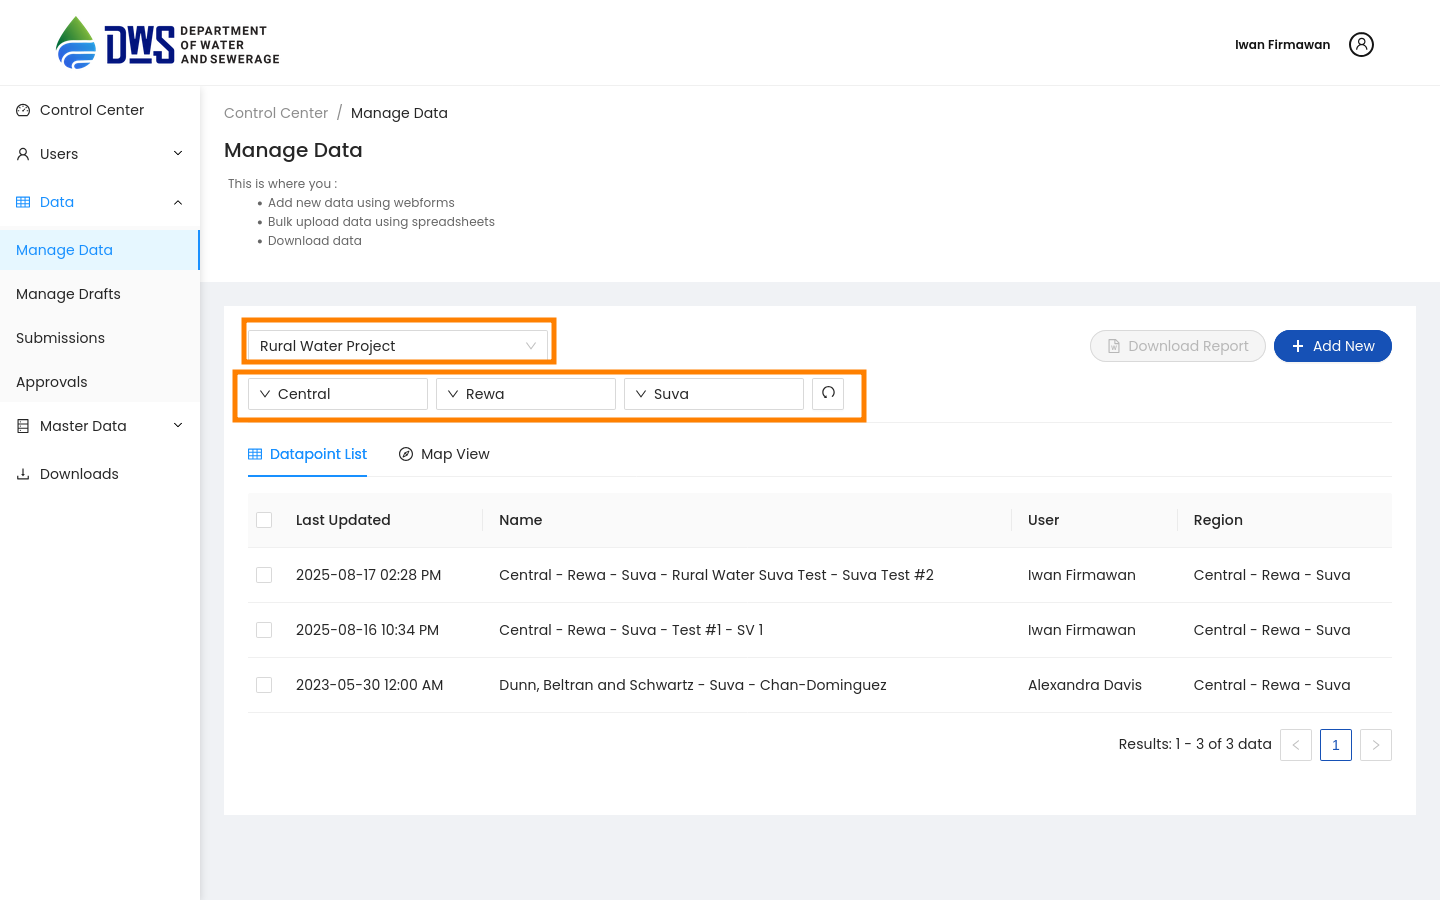
To view, edit or delete existing data, click on the row of the data you want to view. This will redirect you to the Monitoring page, where you can see the registered data along with the questionnaire details.
Editing Data
Note
To edit data, you must have Super-admin privilege or have Form access - Edit permission. You can only edit data that has been registered in the system.
Make sure you already on the Monitoring page of the data you want to edit.
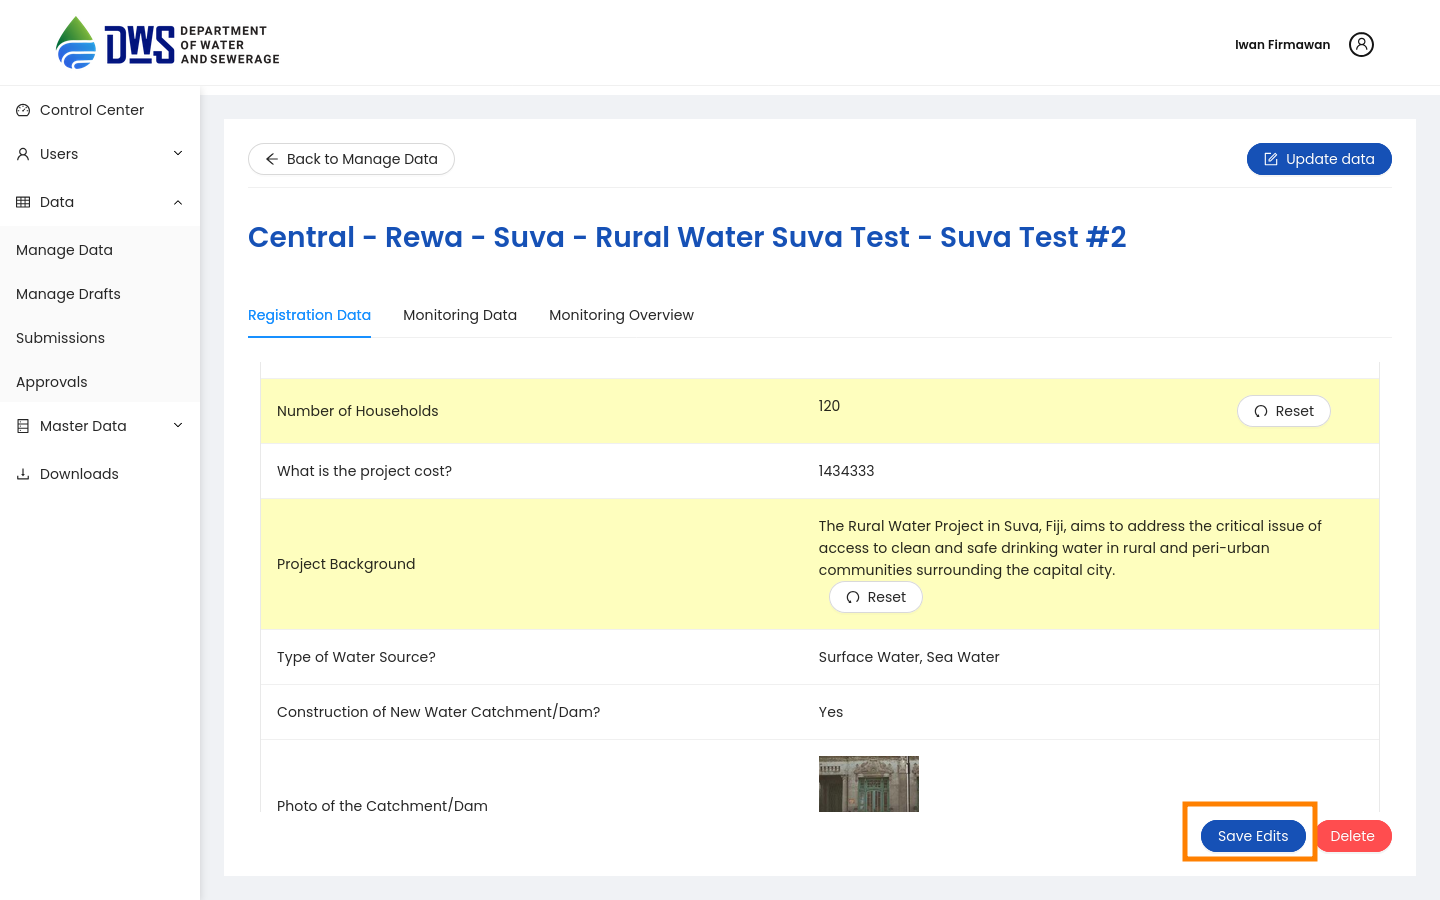
Click the data cell you want to edit. This will show the input field for the selected cell. Click the save button to append the changes. If there is a data that cannot be edited, then the input field will be disabled.
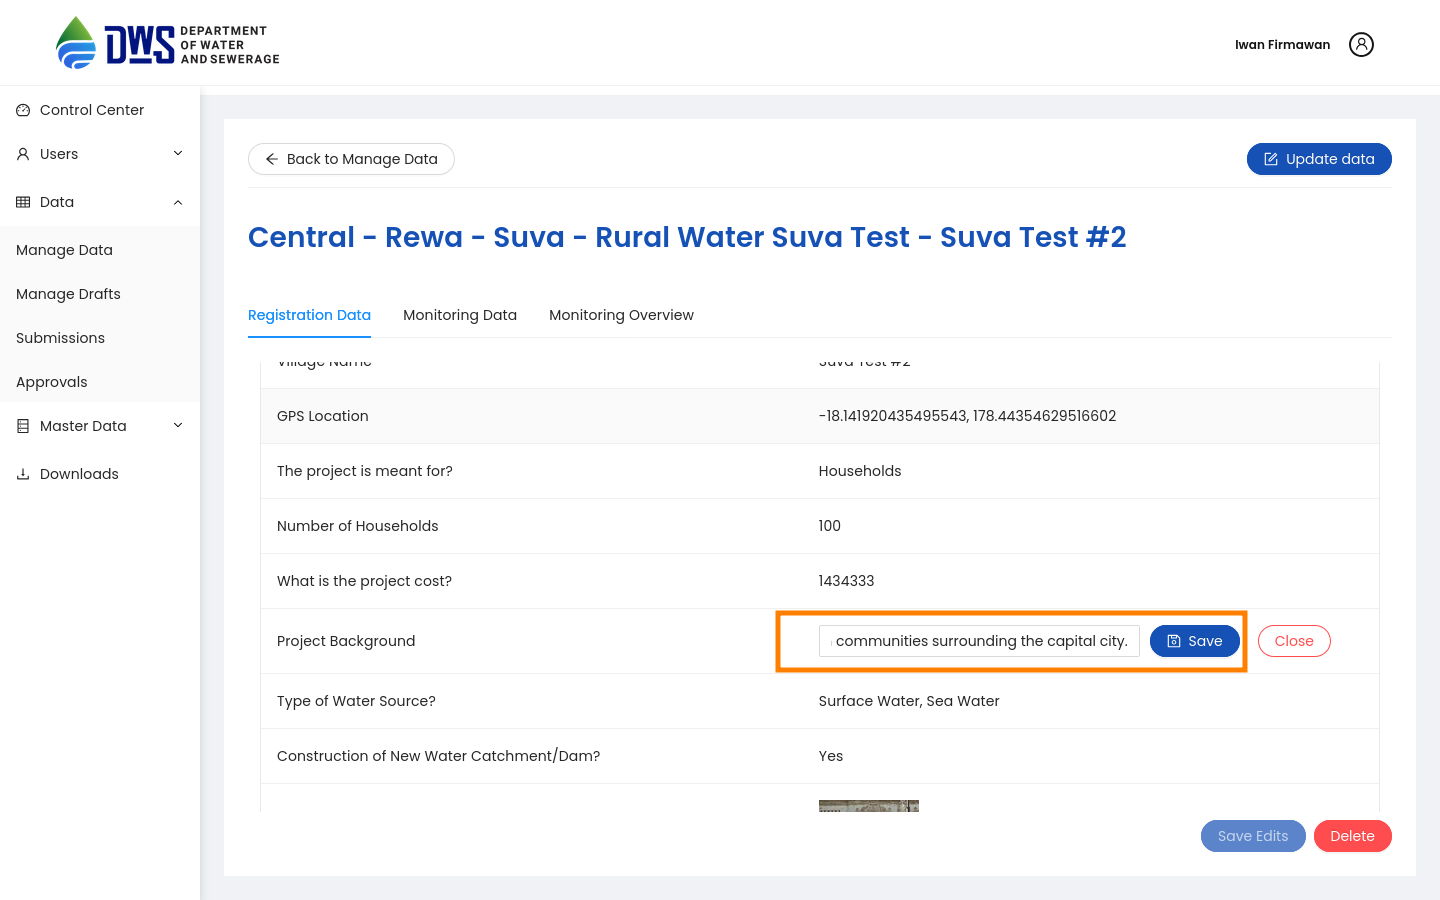
If you have made changes to the data, you can click the Reset button to discard the changes.
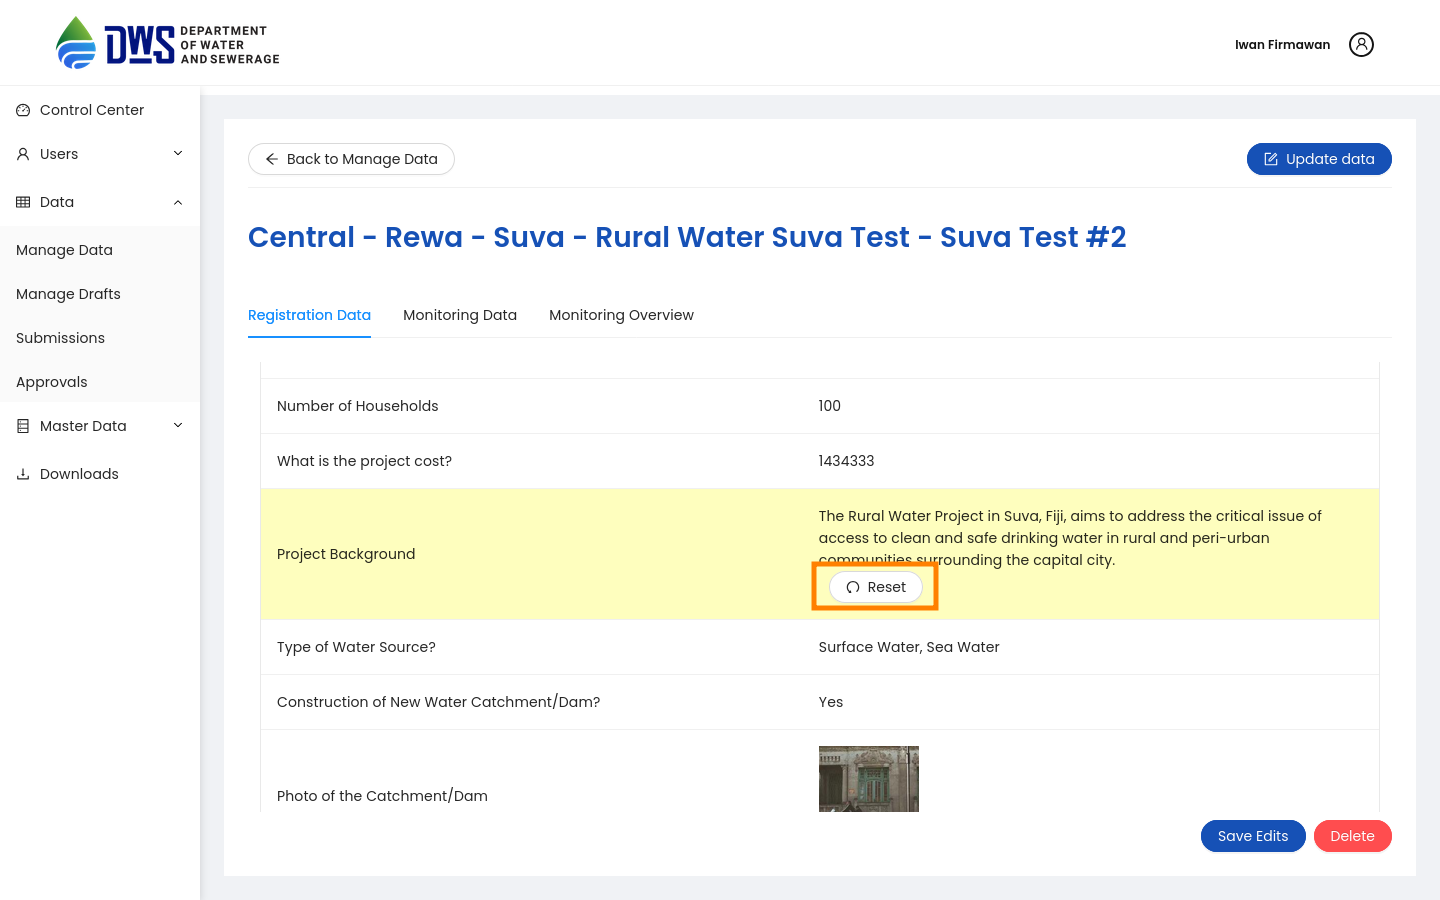
If all of the data is correct, you can click the Save button to save the changes.
Deleting data
Note
Data deletion can only be performed by Super-admin privileges or by users with Form access - Delete permission. You can only delete data that has been registered in the system.
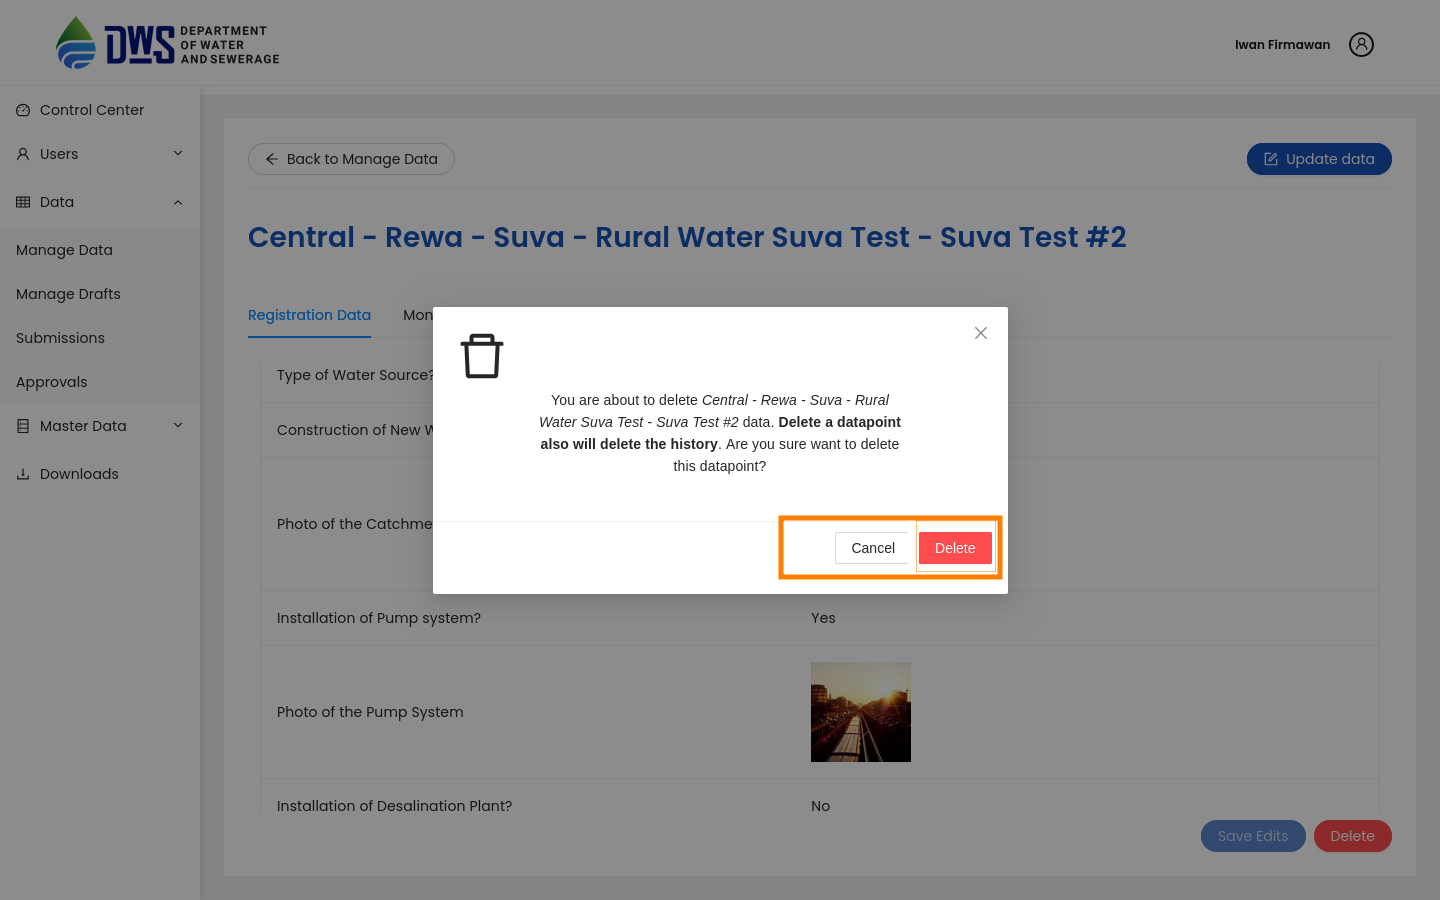
Make sure you already on the Monitoring page of the data you want to delete.
Click the Delete button to delete the data. A confirmation dialog will appear asking you to confirm the deletion
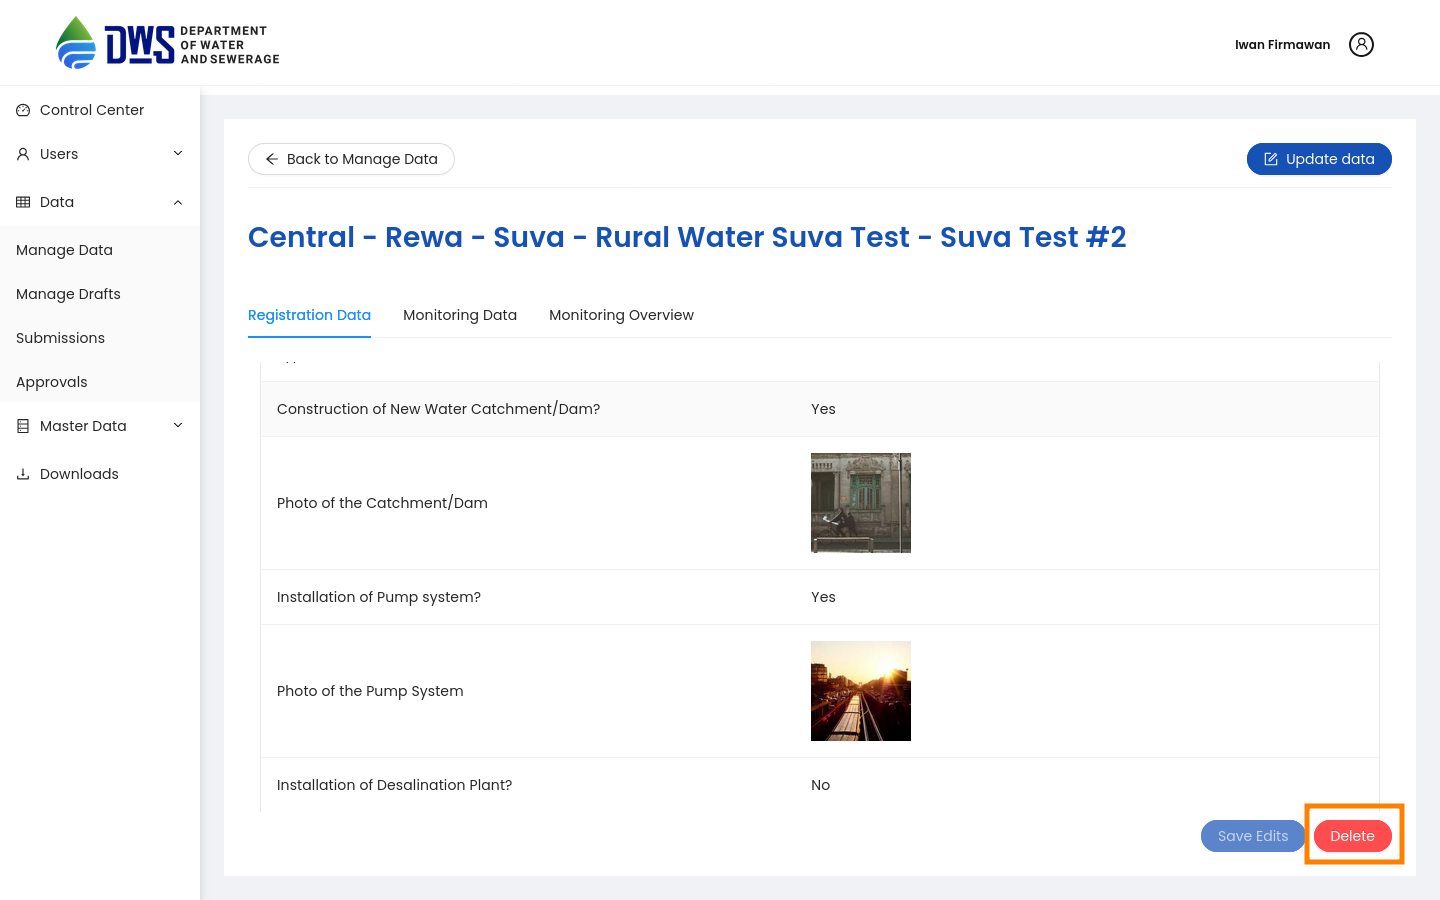
Click the Delete button on the confirmation dialog to delete the data. If you want to cancel the deletion, click the Cancel button.
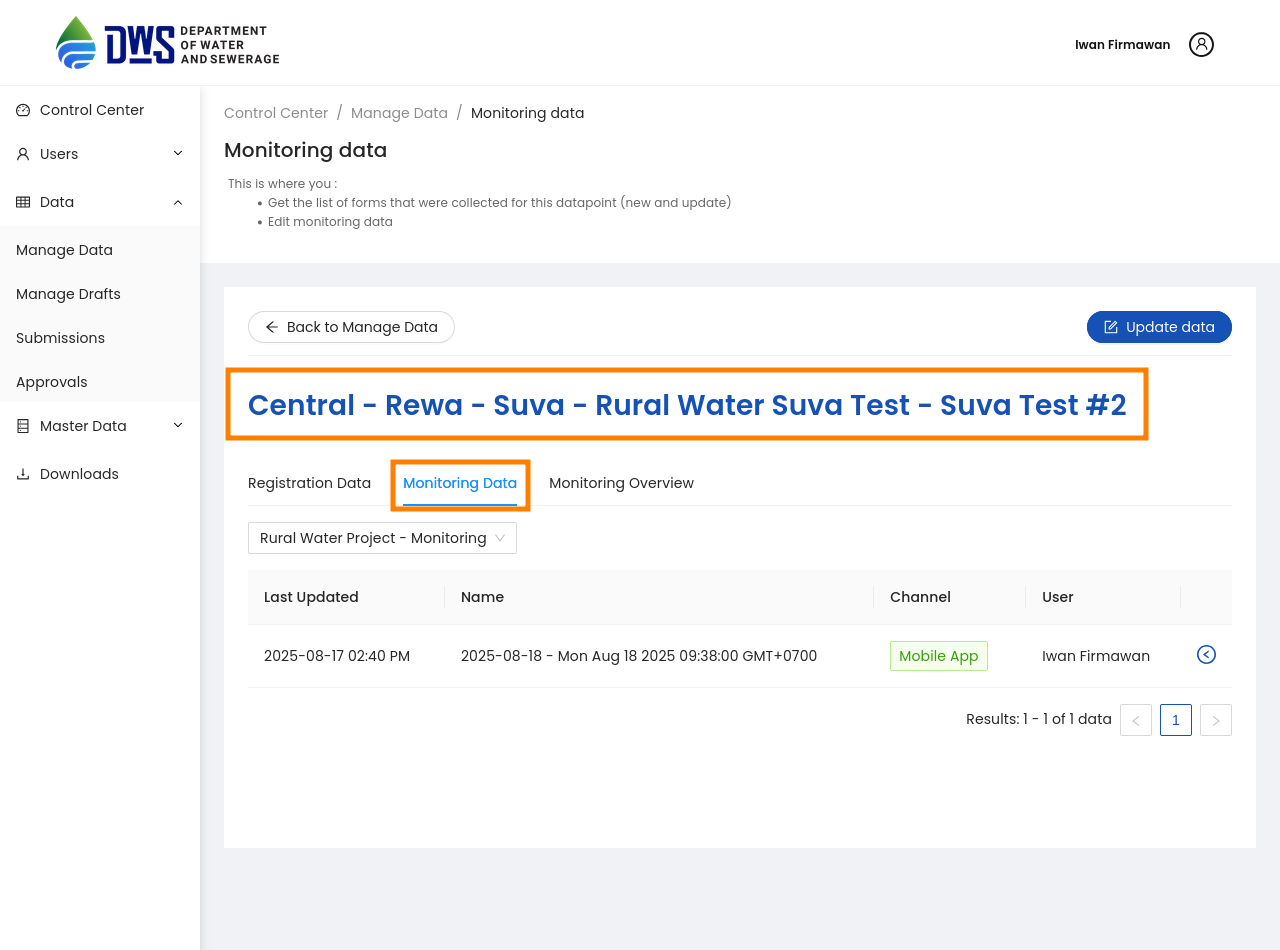
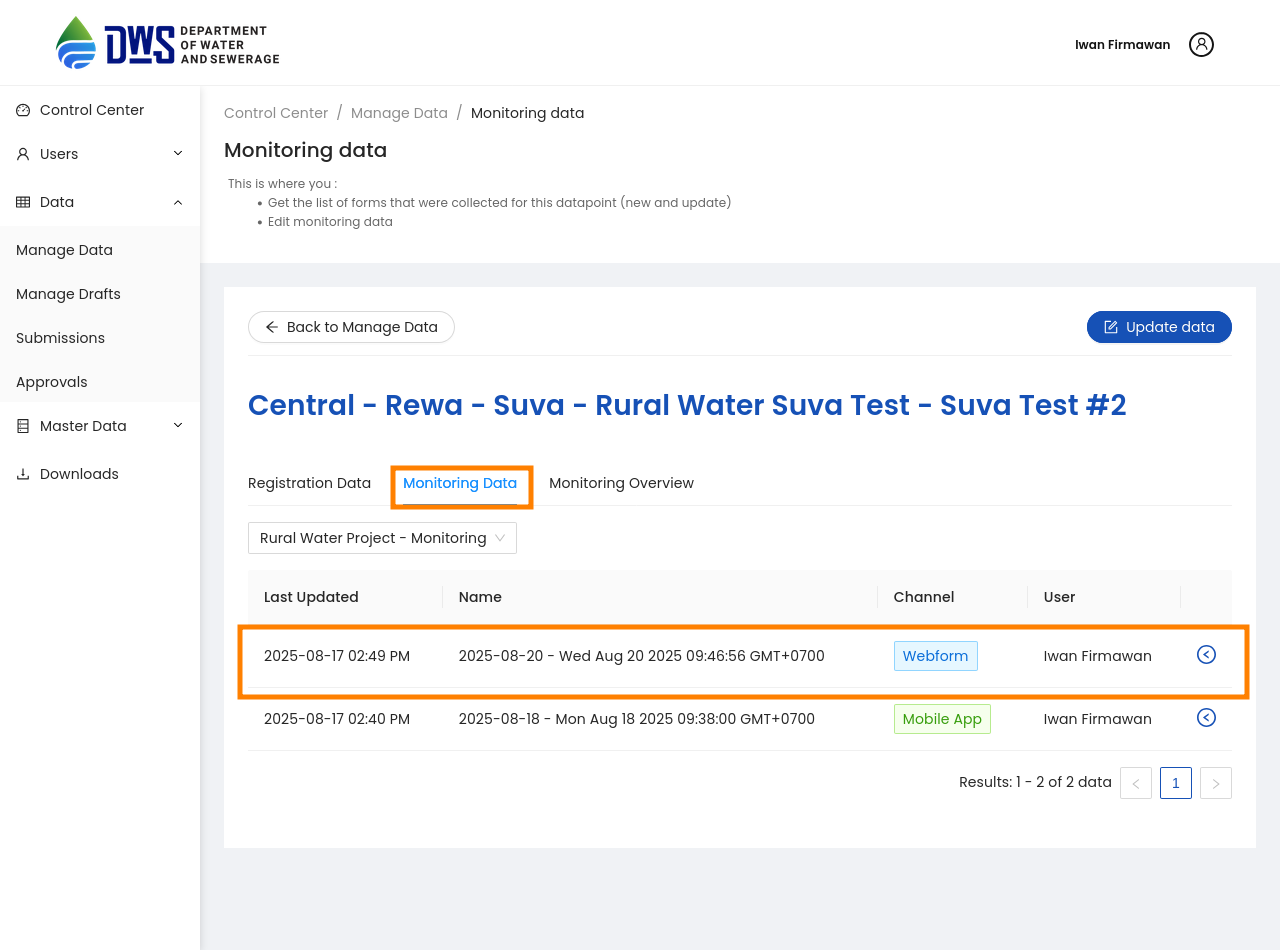
Monitoring Data
Make sure you already on the Monitoring page of the data you want to monitor.
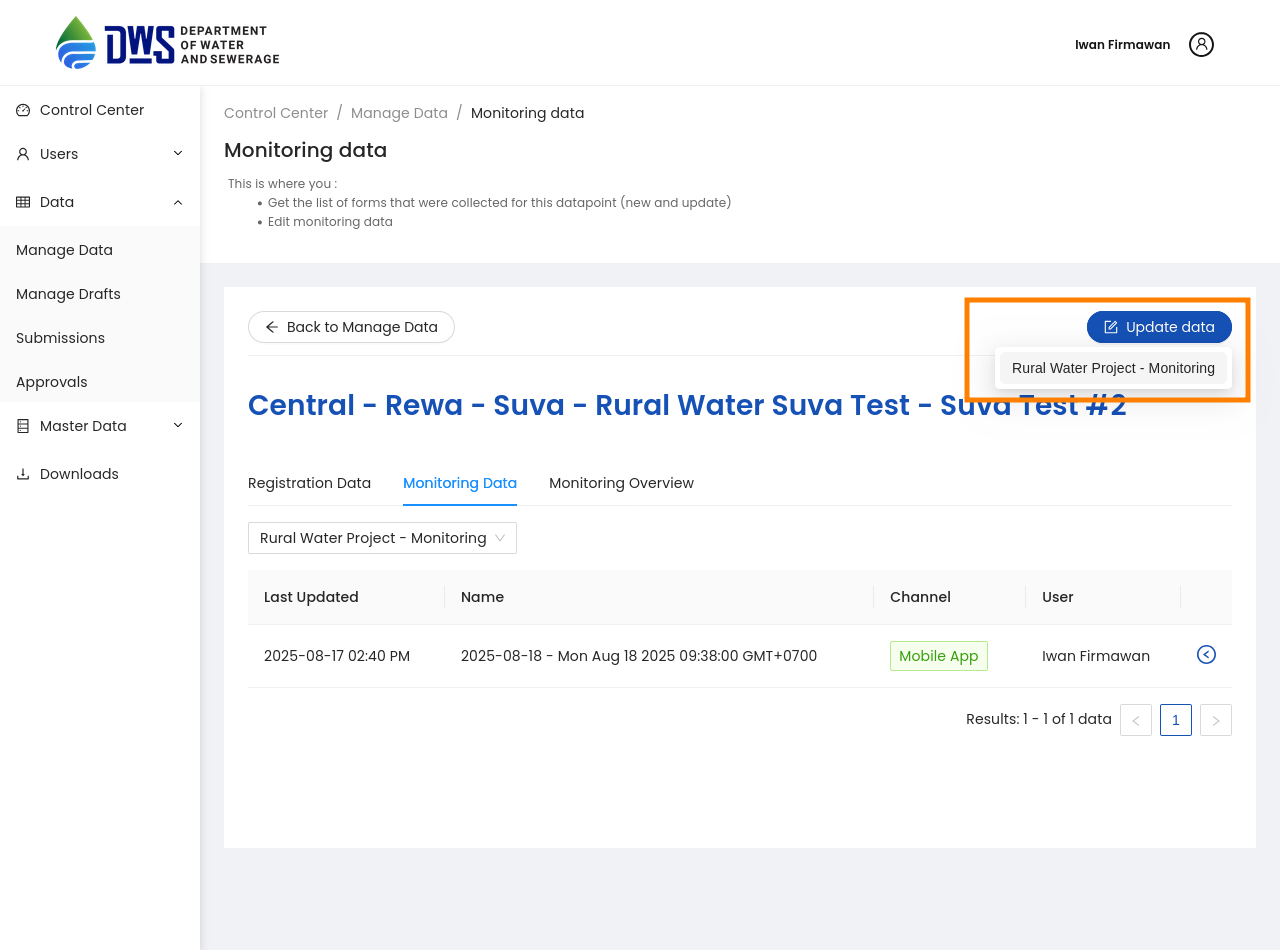
Create a new data entry
Click the Update Data button to create a new data entry. This will show a dropdown with the available monitoring questionnaires. Select the questionnaire you want to create a new data entry for.
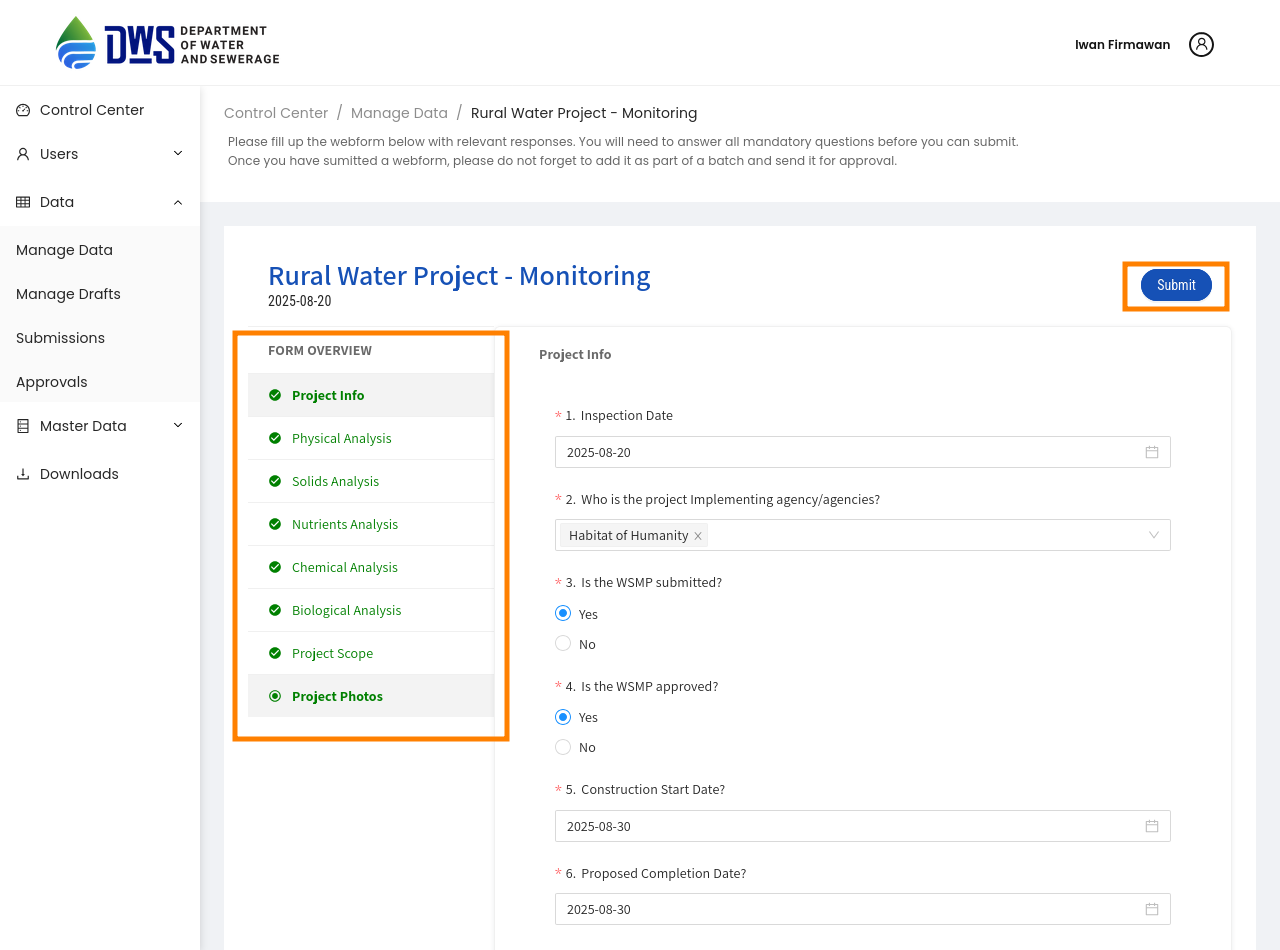
After selecting the questionnaire, you will be redirected to the Webforms page, where you can fill in the data for the selected questionnaire. Fill all the mandatory fields and click the Submit button to save the data.
After submitting the data, you will be redirected to the Monitoring page, where you can see the newly created data entry.
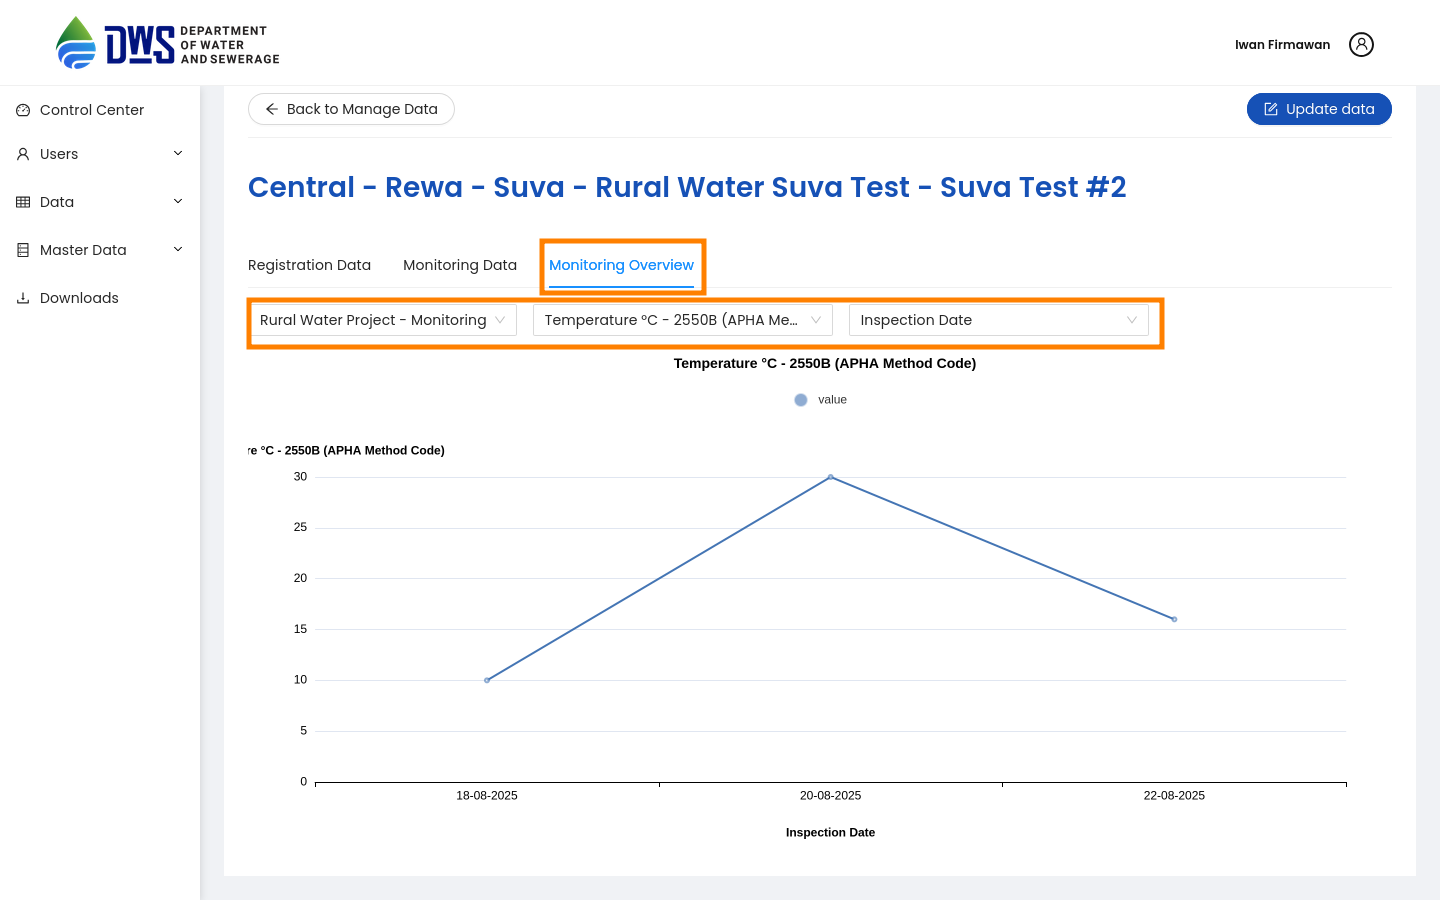
Monitoring Overview
This page provides visual insights into the data collected through the selected Monitoring questionnaire. The number, option and multiple option types of questions will be Y axis, while the X axis will be the date of the data collection. The chart will show the number of responses for each question type, allowing you to see trends and patterns in the data over time.
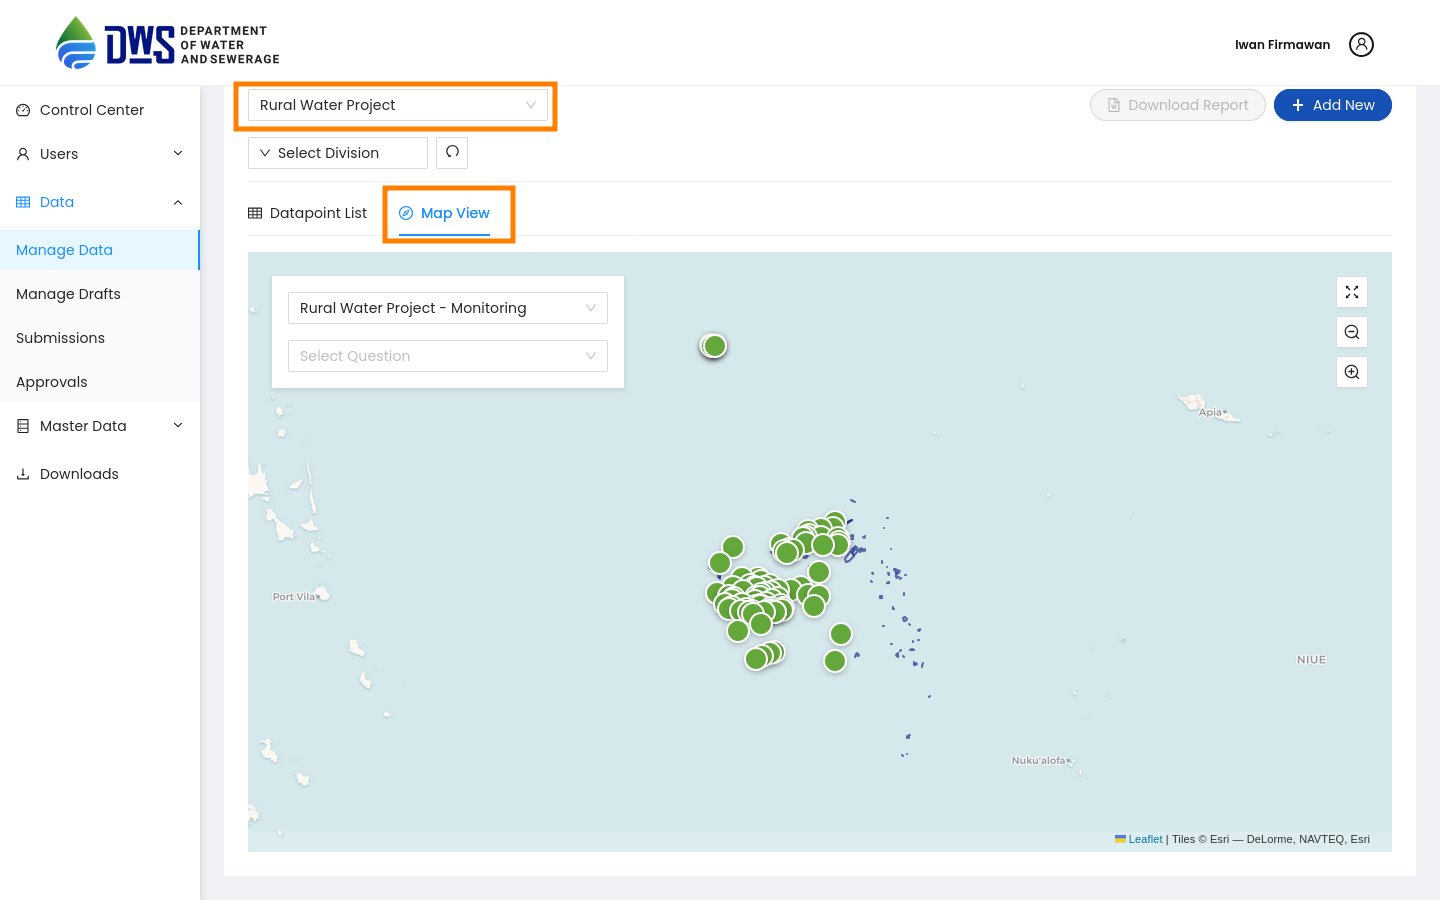
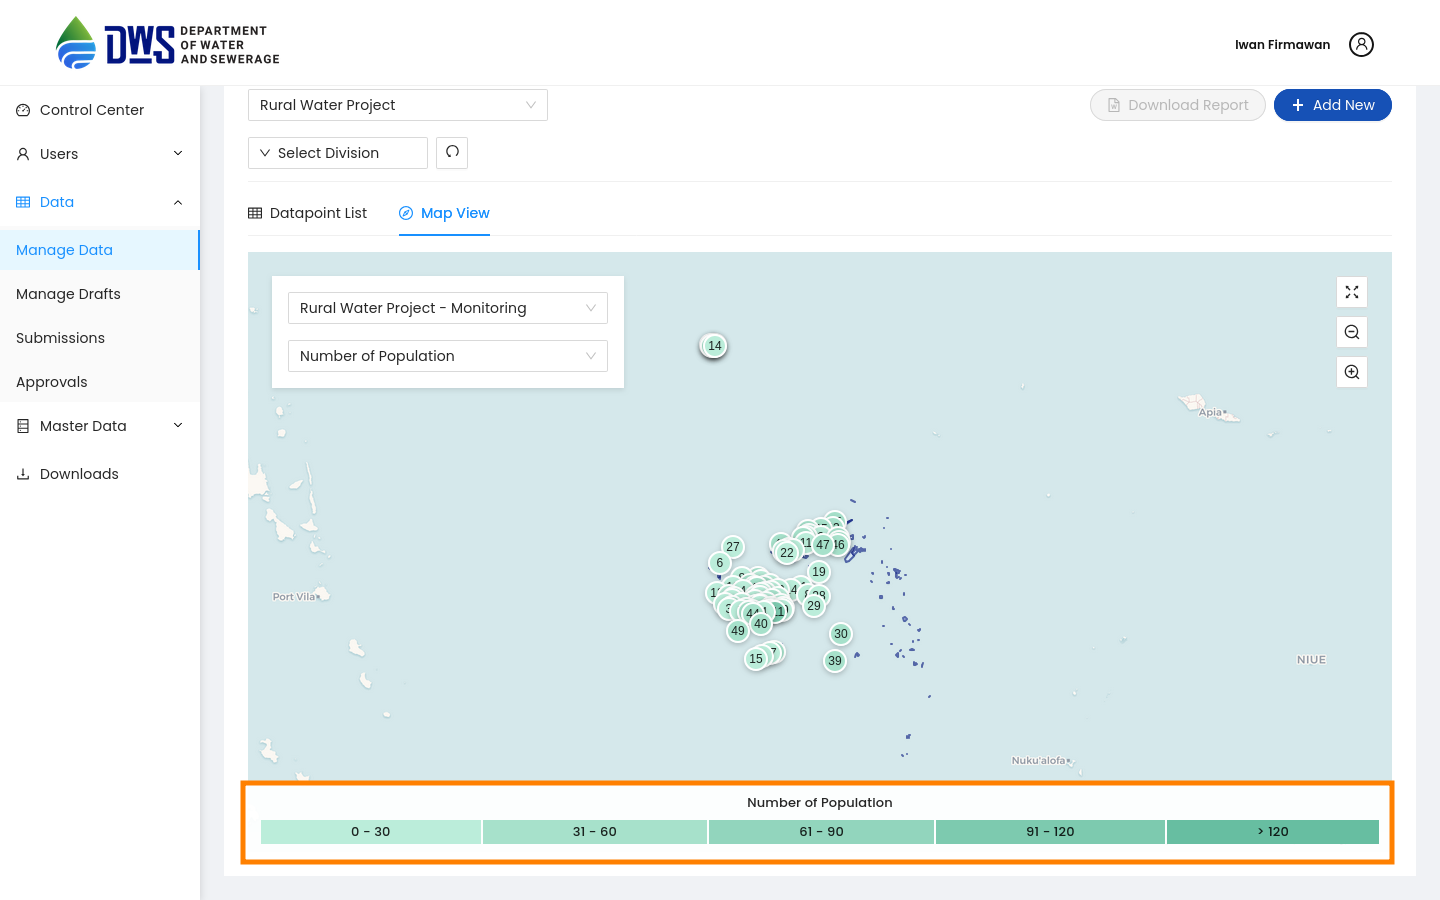
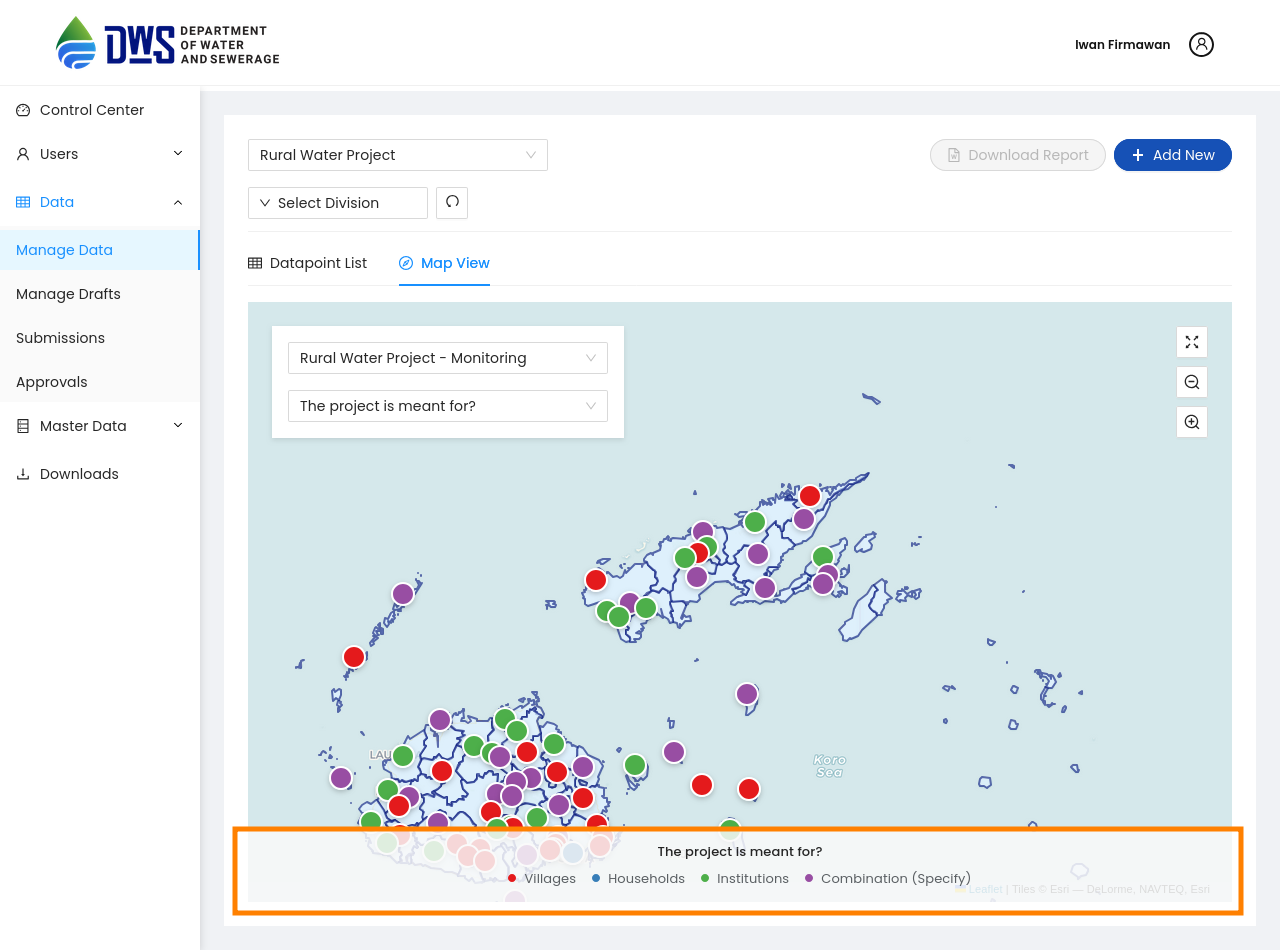
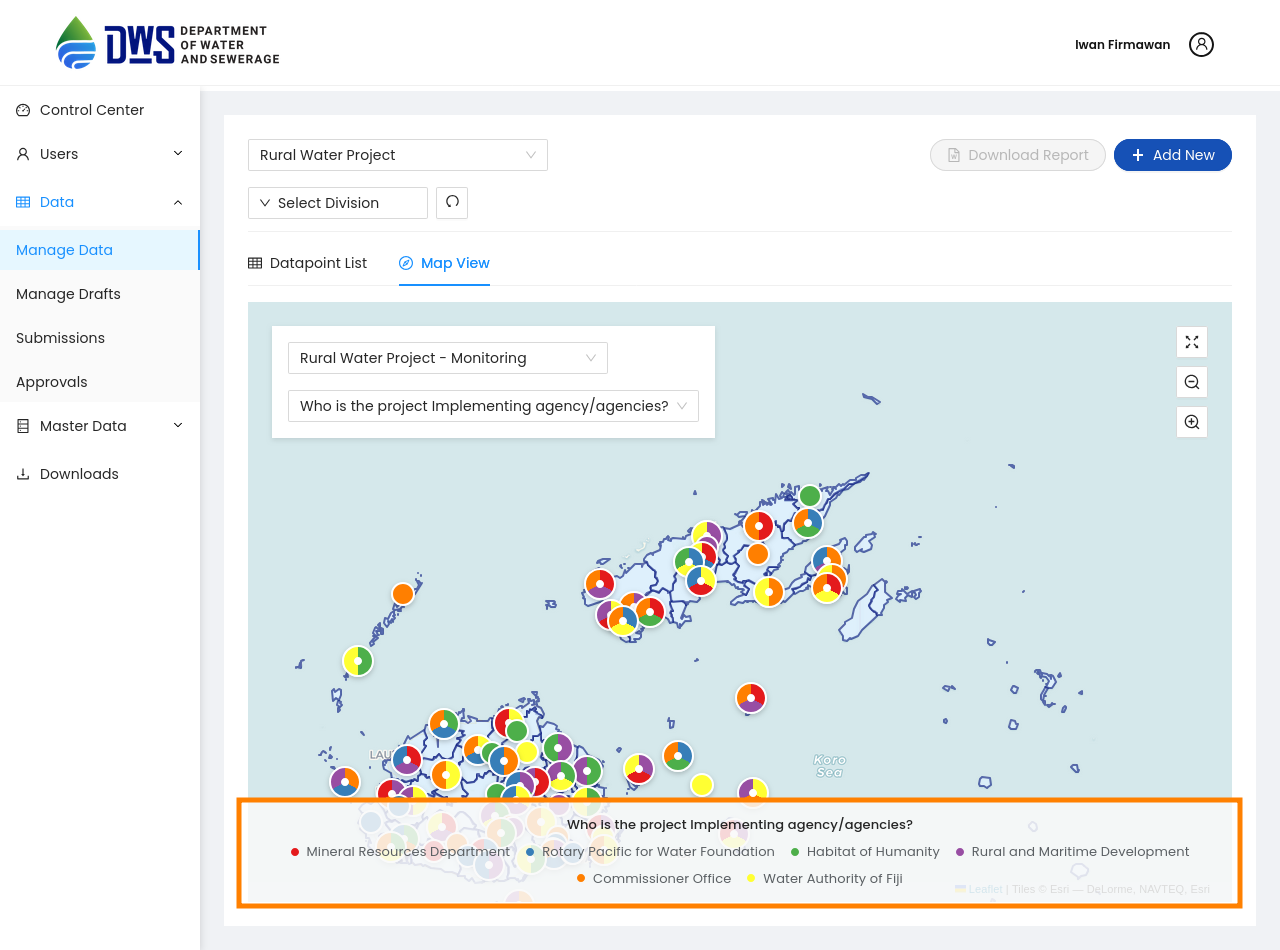
Map View
The Map View provides a visual representation of the data collected through the selected Monitoring questionnaire on a map. It allows you to see the geographical distribution of the data points, making it easier to identify patterns and trends in specific locations.
Number Types
The Number Types section displays the different types of numerical responses collected in the selected Monitoring questionnaire. It provides insights into the variety of numerical data collected, helping you understand the distribution and trends in the data.
Option types
The Option Types section displays the different types of options available in the selected Monitoring questionnaire. It provides insights into the variety of responses collected, helping you understand the diversity of data.
Multiple Option Types
The Multiple Option Types section displays the different types of multiple options available in the selected Monitoring questionnaire. It provides insights into the variety of multiple-choice responses collected, helping you understand the diversity of data.
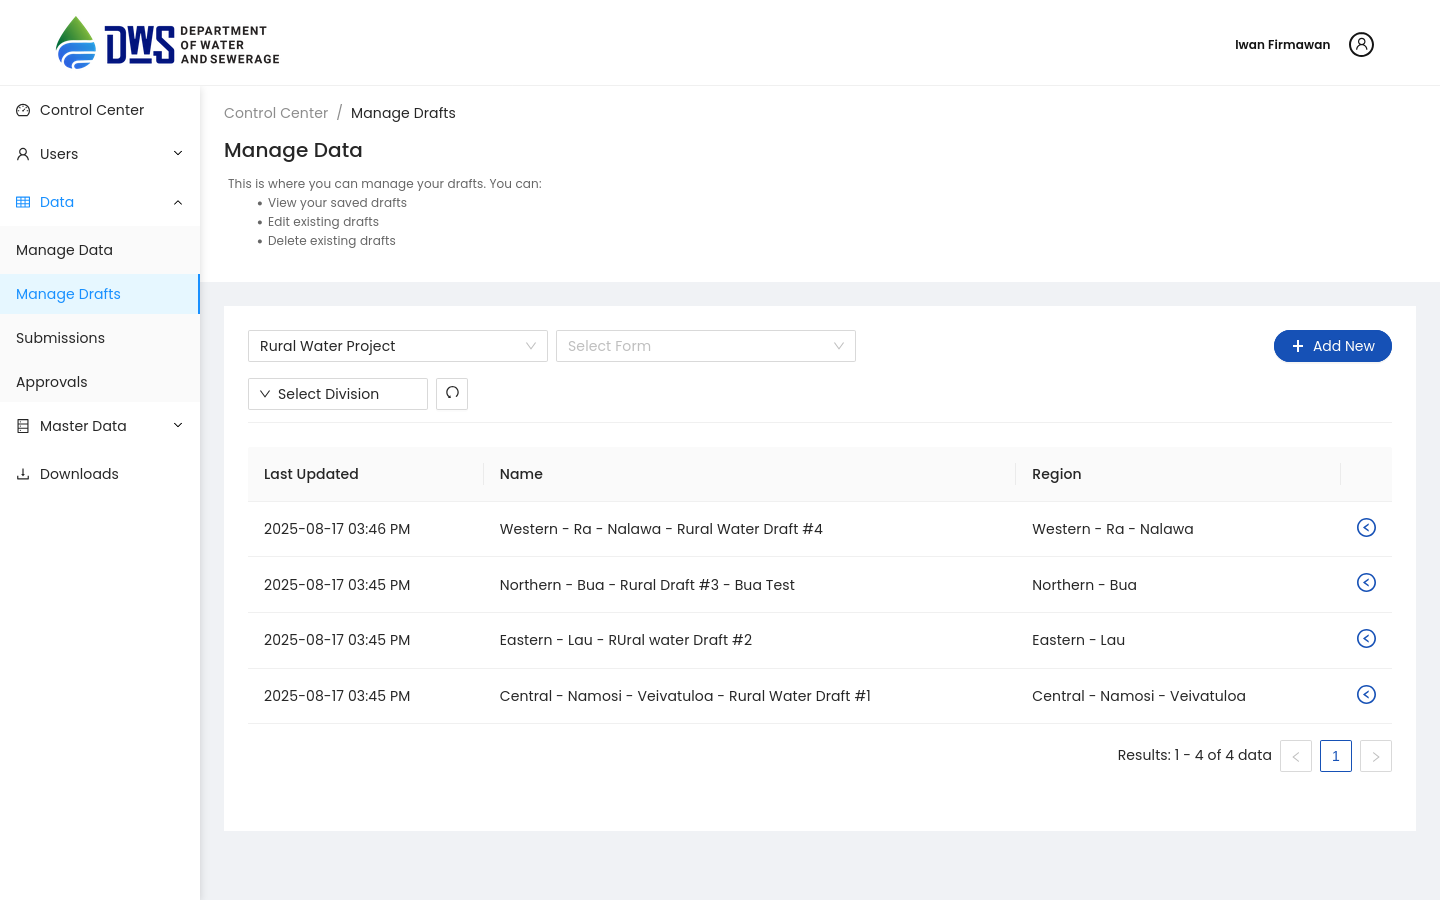
Draft Submissions
Draft submissions are entries that have been started but not yet submitted. They allow users to save their progress and return later to complete the submission. This feature is particularly useful for Monitoring questionnaires that require detailed information or take time to complete, such as obtaining results from laboratory tests. Draft submissions are also synced with draft submissions from the Mobile application, enabling both channels to work seamlessly together.
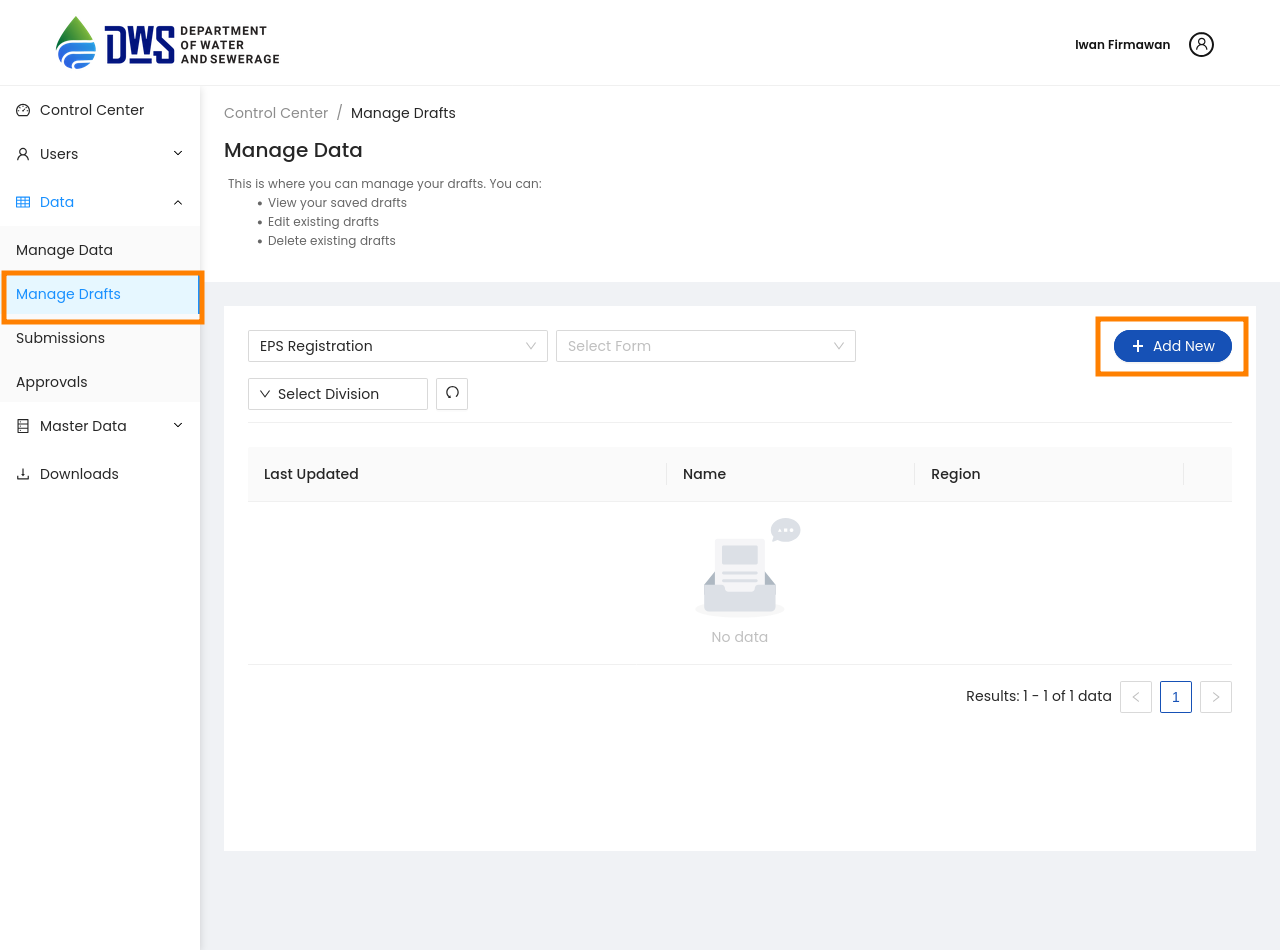
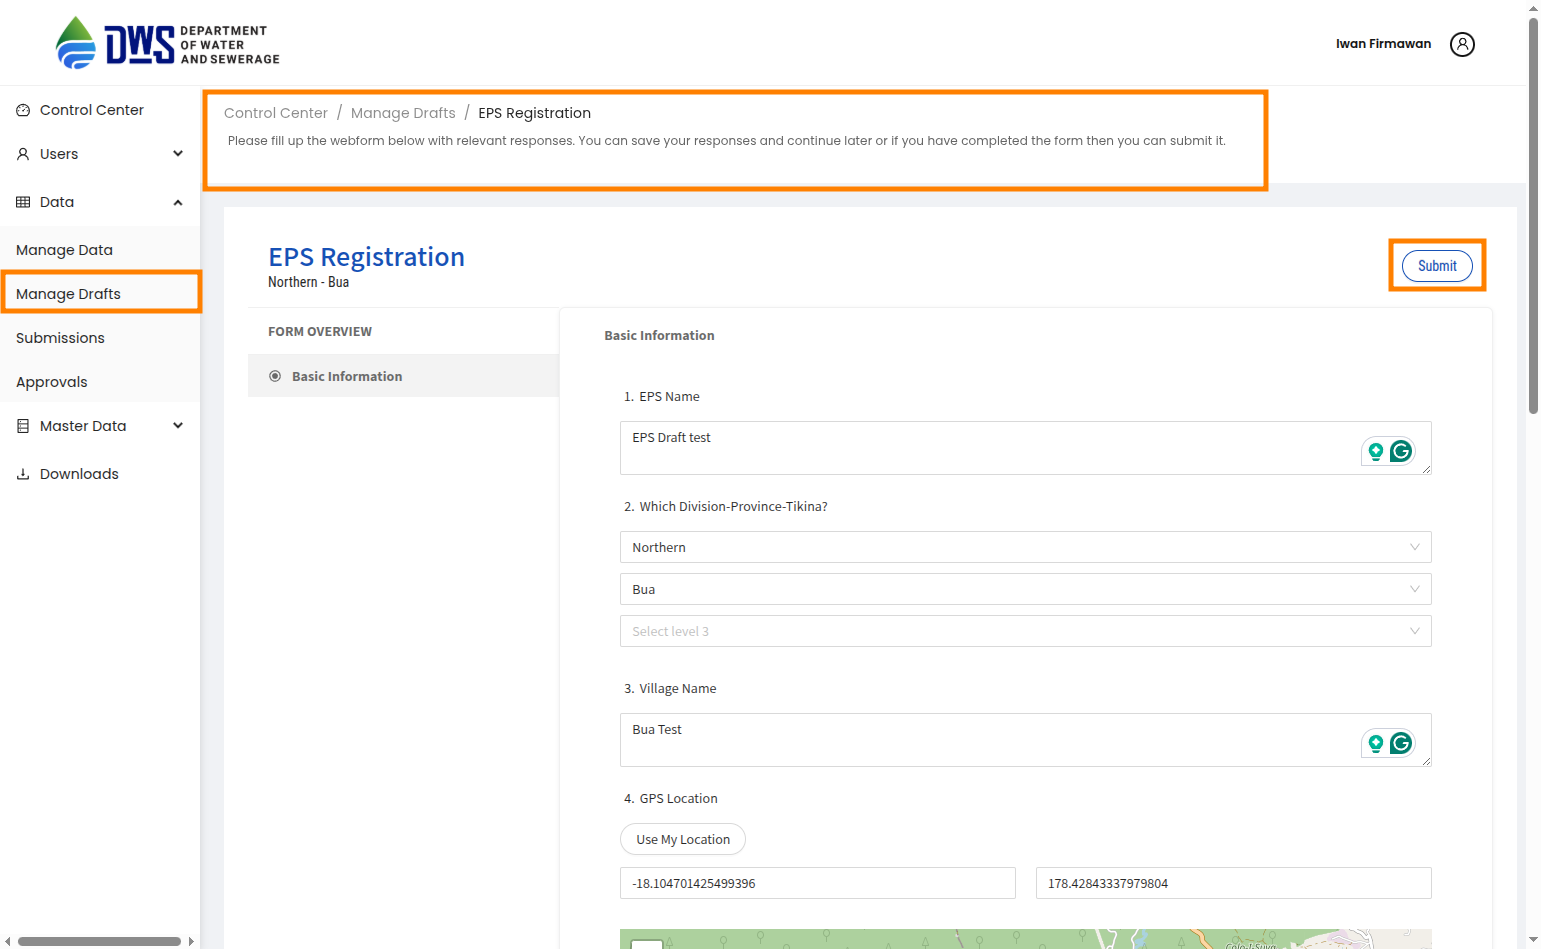
Create a new draft submission
Select the questionnaire you want to create a new draft submission for from the dropdown menu. Then Click the Add New button to create a new draft submission.
After selecting the questionnaire, you will be redirected to the Webforms page, where you can fill in the data for the selected questionnaire. Fill any necessary fields and click the Save Draft button to save the draft submission. There is no validation during draft submission, so you can save the draft without filling all the mandatory fields.
After saving the draft, you will be redirected to the Draft Submissions page, where you can see the newly created draft submission.

Edit Draft Submission
Expand the toggle button next to the draft submission you want to edit. You will have two options:
Edit only: Continue editing the draft submission without validation.
Edit and Publish Draft: Continue editing the draft submission and validate it before publishing as a new data entry.
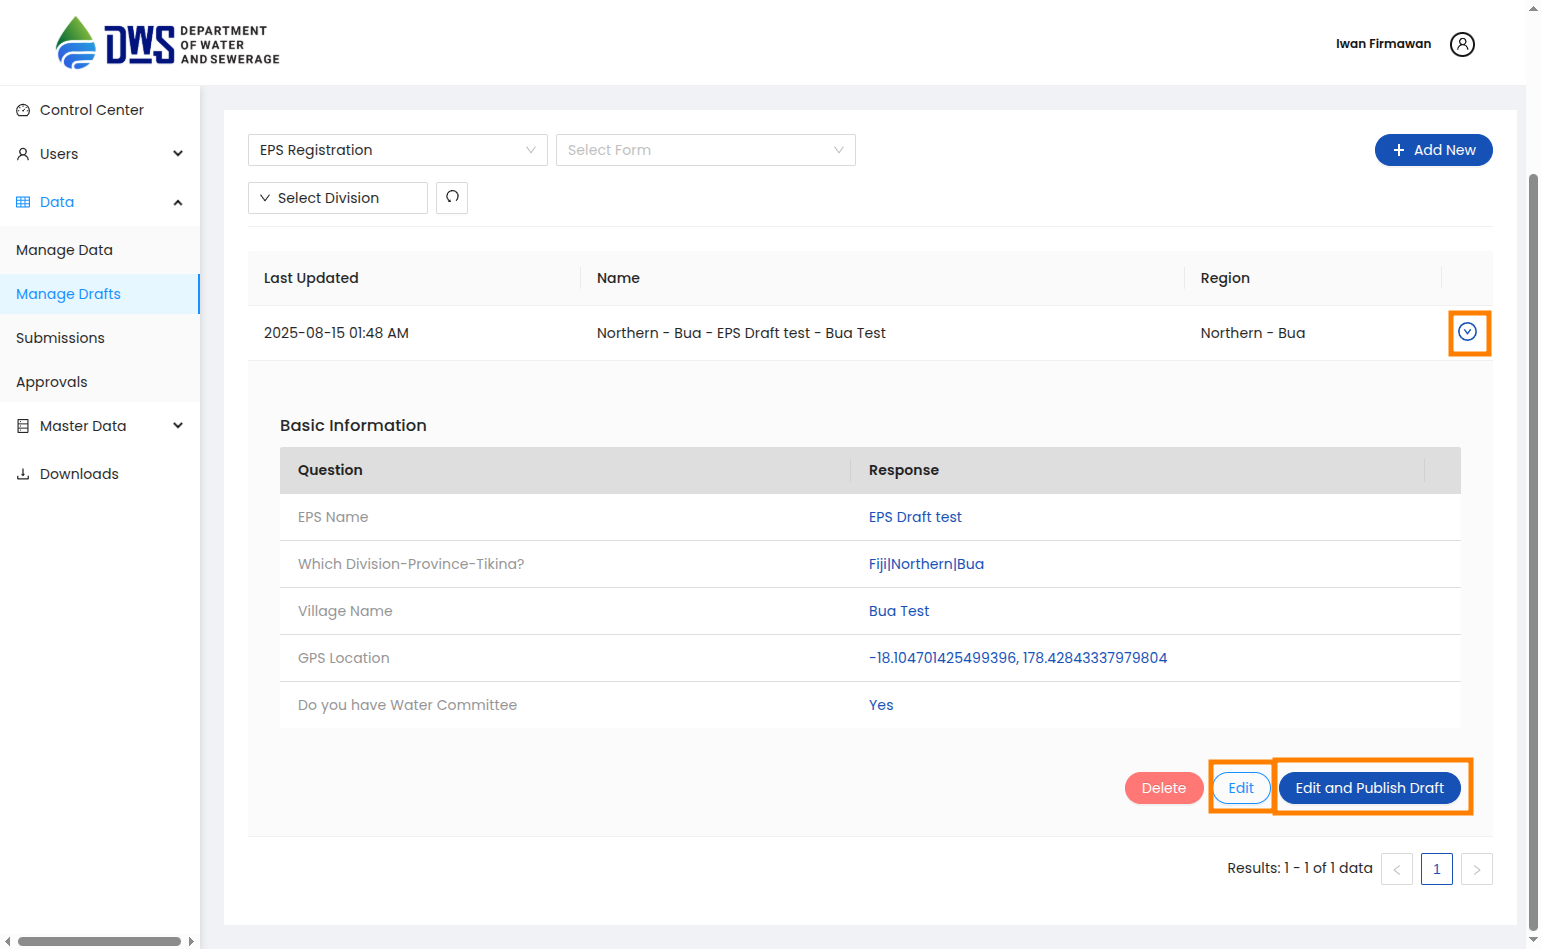
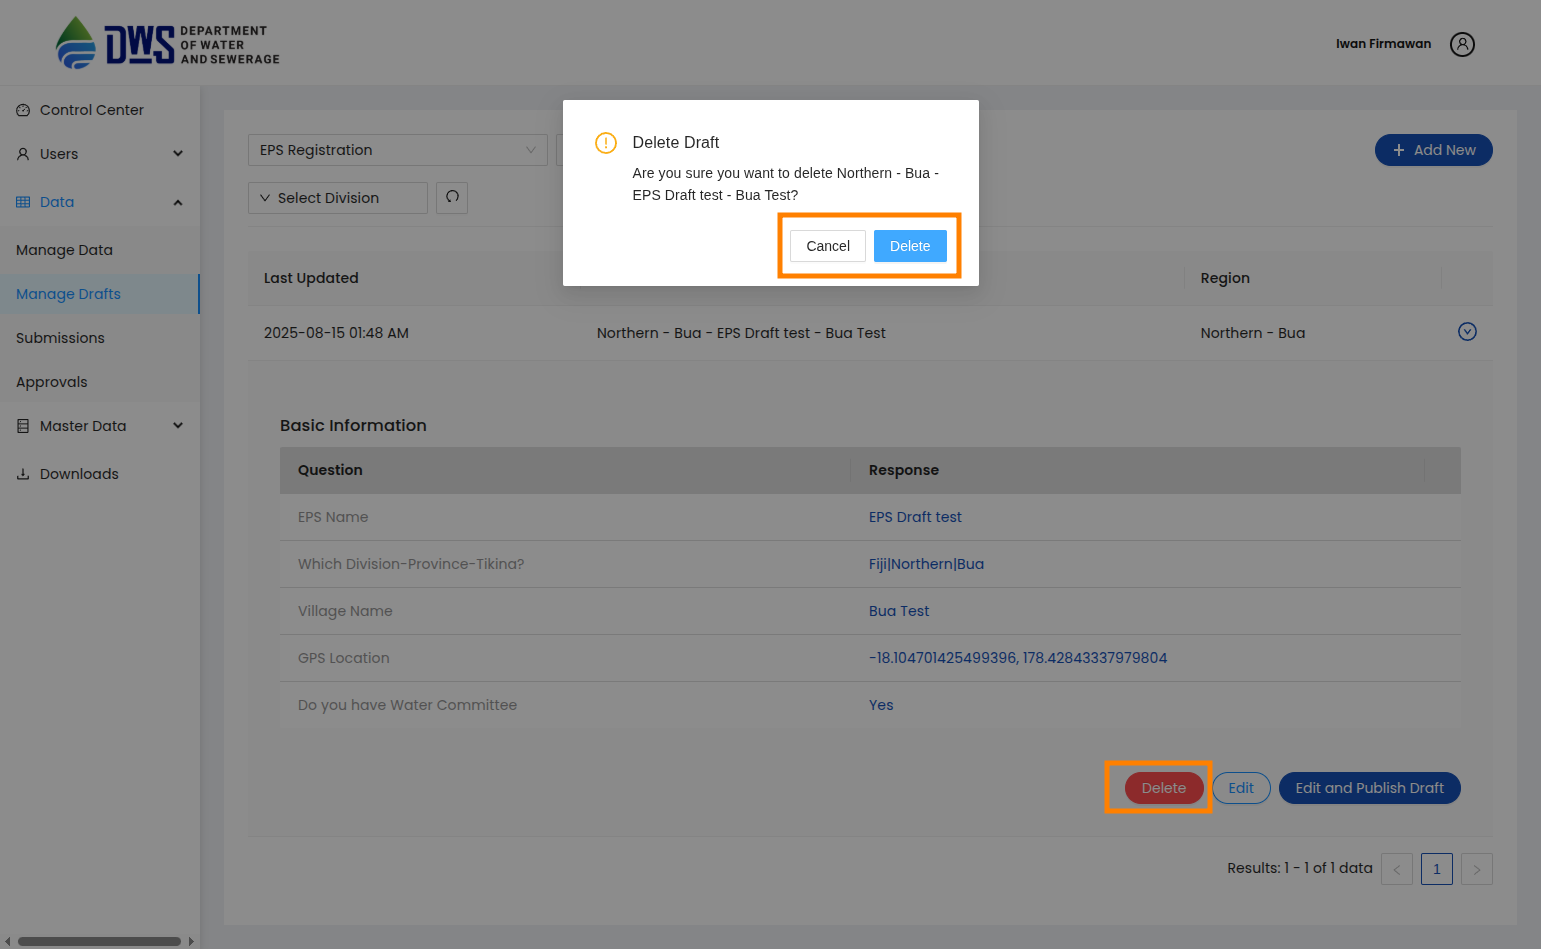
Delete Draft Submission
To delete a draft submission, expand the toggle button next to the draft submission you want to delete and click the Delete button. A confirmation dialog will appear asking you to confirm the deletion.